Beginner Tips for VFX Data Wrangling and Data Capture
- Harry Shaper

- Nov 27, 2024
- 9 min read
Updated: Jun 1, 2025
When stepping onto a film set for the first time, it's easy to feel like you're diving into uncharted waters. While there are plenty of learning materials available, few can truly prepare you for the reality of being in the thick of it.
Making mistakes is part of the process; it's how we grow and learn. However, this doesn't mean you shouldn't prepare as much as possible.
Over the last few years, I've come across some notes and insights that I've found helpful. With that in mind, the following tips are designed to help you navigate those early challenges, so that hopefully you'll make fewer mistakes along the way and have a smoother journey into the world of VFX data wrangling and on-set data capture. Enjoy!
Balls and Chart
Introduction:
Balls and charts are the data-wranglers bread and butter. This is the industry standard for VFX reference material and addresses colour conformity as well as lighting for CG assets. Although this topic deserves its own article, I will quickly summarise their primary use before presenting my notes. Chrome and grey ball data is typically captured when a VFX shot is expecting a 3D asset or character. The colour chart is more general and has use-cases for both 2D and 3D VFX work.
The chrome ball gives the camera a 180° view of the surrounding light conditions. This data assists 3D artists with correctly orienting an HDRI (High Dynamic Range Image) so that their asset is lit from the correct direction. (Figure 1.1)

The grey ball is essentially a canvas to address the main qualities of light, being direction, colour, and intensity. By analyzing shadow and the light's form around the sphere, an artist would attempt to recreate the lighting conditions on a digital replica. (Figure 1.2)

The Colour Chart (commonly reffered to as a 'Macbeth') is used to address the colour present in a scene and how it is being affected by a light source. By having a standarised tool like the colour chart, artists are able to colour-neutralize plates, white-balance, prepare 2D assets for integration and gain an understanding of a light source's influence on a subject. (Figure 1.3)

Chrome and Grey Ball:
Position your reference material where your CG will be. Artists try to understand the qualities of light surrounding their asset and won't be as accurate in a different position.
Stand behind your chrome ball*. As it is a 180° reflection, if you are slightly in front of it, you will obscure information from the camera's perspective.
Be aware of your light source. Even if you are standing behind your ball, you could be casting shadows on your grey sphere and not notice. If you are casting shadows, make sure to either stand to either side or kneel down and hold it above you. (Figure 1.4)

Colour Chart:
Although the positioning of reference material is incredibly important, it's very easy to overlook the angle of the Macbeth chart. As you will likely only have one chance to get this data and only one frame is required for colour calibration, avoid holding the chart flat (Figure 1.5). Instead, consider making a habit of angling the chart at different positions (Figure 1.6). Although it might seem insignificant, between your chart being angled slightly downward or slightly upwards, lighting information will be missing and the results will vary.

Figure 1.5 
Figure 1.6
Witness Camera
Slate! Sorting data is a huge part of a wrangler's job, and you want it to be as easy as possible. If information has changed, or you wrote the incorrect details, tail-slate and be sure to make a note of it.
The primary role of the witness camera is to observe the relative positions between cameras, lights, actors, and potentially other areas of the set. Generally, a good position will be between multiple points of interest and see as much of the set as possible (Figure 2.1).

Figure 2.1 Finding a good position is not just about what you can see, but also what can see you! Make sure to stay out of the eyeline of actors and out of any action paths of cameras or actors. Setting up next to a light, a silk, or a flag is generally pretty safe, as they are fixed in the set and actors won't get distracted by them.
In the past, my supervisors have requested different camera heights for certain shots. Having a high-angle (head height) camera will give different benefits to a lower-angle (waist) camera.
High-angle:
Having your camera in a higher position (Figure 2.2) allows you to see more of a ground plane. With this information from multiple camera angles, triangulating cameras and set positions becomes much easier.
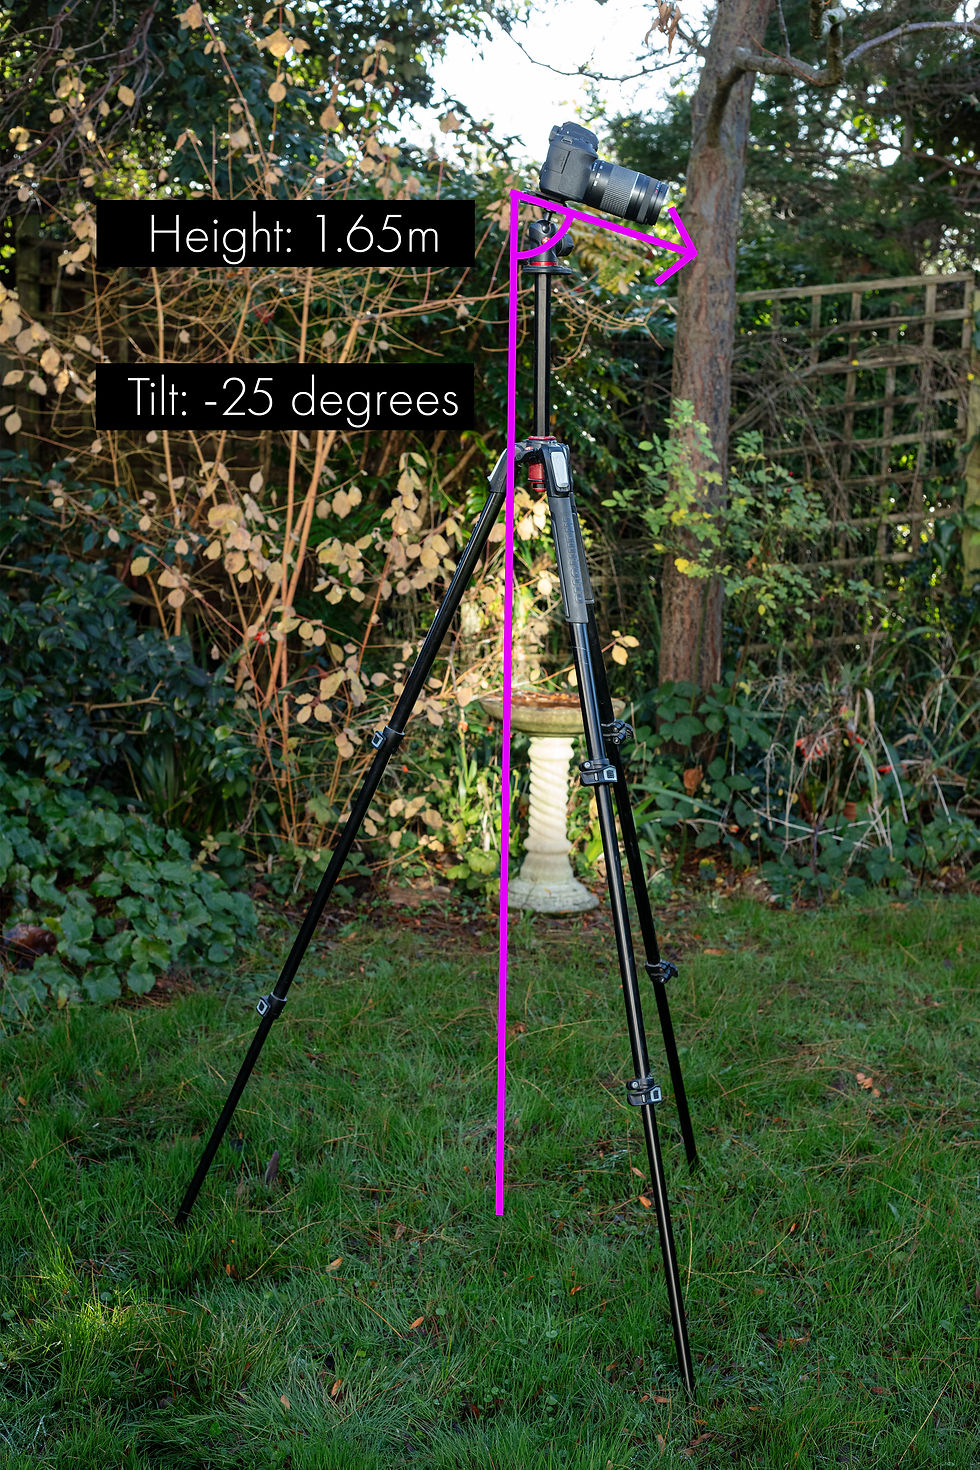
Figure 2.2 Low-angle: Although the higher-angle camera is used more often, placing a witness camera at waist height allows a more neutral angle (Figure 2.3). This allows subjects to be rotoscoped and positioned in 3D space on a 2D card/plane, being used similarly to a sprite asset (Figure 2.4).

Figure 2.3

Set Reference - Photography
Your main goal is to grab images of the set. This is largely positional reference, but also shows scene contents, camera filters, rigging, set-dressing, costume and types of lights. If you're unsure about some of your database contents, reviewing your set-ref will hopefully clear things up.
Make sure your camera's time and date are set correctly! Although the images are important, placing them in the correct scene and shot number is just as important.
Folder your images by scene/shot/take, and if you weren't able to get a slate picture, make notes on your phone.
For this, wider angle lenses such as 18-35mm tends to cover most situations.
Camera settings: If shooting manaul, important settings include: NB - Exposure triangle settings depend heavily on environment - Image size and quality: RAW and Jpeg - White balance: Anything except white balance (Use a grey card or best judgement to set temperature) - Shutter speed: 1/160 to 1/200 is ideal. Can go closer to 1/100 if incredibly steady or using monopod. (Can also use image stablization for compensate) - F-stop: Shooting above f5.6 is recommended as you will start to lose depth of field (DoF). However, on wider lenses, DoF becomes less of an issue. - ISO: I tend to keep my ISO under 500 but this is usually the first setting to change when prioritising sharp images with lots of depth of field required. If you are needing to grab texture reference, you ISO needs to be as low as possible. However, shooting textures is a large topic and will be explored in more depth in the future.
Shutter priority is generally a pretty good way to capture well-exposed images quickly, ensuring your shutter speed is around 1/200 or faster. This is obviously light dependent. In lower light environments, you might need to use a monopod set-up and go down to a slower shutter speed.
Label your storage and have a data management system. Simply labelling your SD cards can save time looking for data as well as prevent formatting hot data (Figure 3.2). Along with this, I reccomend having a place to store all hot data from the day. This makes it easy to discern what needs ingesting and what has already been ingested.

Set Reference - Disto and diagrams
Understanding where things are on a set is extremely important. Although we should have lots of photography reference, this is often times not enough to gauge exact measurements that will aid 3D artists. Although some productions have a lidar technician getting live scans of the set, this is often a luxury, and you'll need to record this data by hand. This is where a distometer and diagrams come in to save the day.
Record the distance from your subject to the light source, as well as the height/angle/dimensions of the light source. A lot of people think an HDRI will just work out the box, but in actuality, it is quite common for a lighting artist to need to add additional light sources in 3D space to make it look correct when comparing the chrome/grey ball to their digital version. By immediately knowing the position and area of the light source, final results are achieved quicker and more accurately.
Use shot-designer or other similiar applications to make top-down diagrams of the set. Free and easy to use, shot-designer allows detailed layouts of cameras, lights, actors and the ability to add any notes you might have. (Figure 4.2)

Figure 4.2
Database - Filemaker Pro
With most wrangler's tasks, speed is important. If you have a five-camera set-up that's very VFX heavy, think about the details you can't easily get off a Q-take screen-grab. This will usually be info like camera height, inclination, distance to subject and external filters. Note that playback details will change from set to set, and more details might be visible on your production.
Grab a screenshot of the start, middle, end and slate of the shot. From this, you can discern most shot info, camera movements and lots of other details.
If camera focus distance is being displayed on Q-take, that is great! If it isn't, I'd reccomend recording the start, middle and end focus distances. This data to very useful for a compositor matching defocus on an element.
HDRI's
HDRI's need to be captured as quickly as possible! The whole crew is waiting for you and assume you only get one chance. Map your camera settings to a custom profile for quick access. (Figure 5.1)

Carry a lens cloth or a lens pen. Wranglers have a million things to do in a day, and forgetting to wipe your lens can easily slip one's mind. Although set might get messy, keep your HDRI's clean.
Set your No Parralax Point (NNP) and record the numbers. This means more accurate stitching on your pano and it is super quick to set. Reference guide here (https://www.johnhpanos.com/epcalib.htm)
Weta produced a video entitled, "The Definitive Weta Digital Guide" (Available here https://www.fxguide.com/fxfeatured/the-definitive-weta-digital-guide-to-ibl/). This is hands down the most informative video available on the subject. Most of the best tips I can give for shooting HDRI's are in this guide.
Tracking Markers
Consider the shot. Review the image in Q-take and see where your markers will be best placed. Try to get maximum coverage in distance and make sure they aren't occluded. Taking the few extra seconds can mean somebody won't have to spend extra time rotoscoping/keying hair that's in front of a marker. (Figure 6.1)

Figure 6.1 - Grimes - 'You'll miss me when I'm not around' No affiliation - Property of Grimes Put simply, tracking works better when there are shapes with sharp edges and contrast. Consider making 'X', 'T', or 'L' shapes for better results. A small square of gaff has 4 corners to pinpoint, but an 'L' has 6 and a 'T' will have 8. More so, the variety of shapes means fewer visual similarities for the tracking artist and the software identifying features. (Figure 6.2)

Figure 6.2 - 'Deadpool 2' (2016) No Affiliation - Property of 20th Century Studios
Knowing the distance between your markers will give your match-move team more information to work with. If you don't have the time to accurately measure them out, try and grab the distance between at least two of them.
General Tips
Be proactive! You don't know how much time you'll be given to get certain data, so get what you can while you can.
Although you think you might know how to do one or more of these tasks already, your role as a VFX data wrangler is to execute the needs of the on-set supervisor or your lead data wrangler. This means that you need to complete the tasks to their standards and requirements.
It's better to have it and not need it than to need it and not have it. Although it wasn't originally meant to be a VFX shot, things change all the time and maybe getting that HDRI was a good idea.
Lidar scanning on a live set is always a rush. A lot of time is spent waiting for the perfect moment or holding back because you think you won't have enough time. It's generally been best for me to just start the scan and cancel it if they are about to roll. Like that old saying, "The best time to start a lidar scan was 50 seconds ago, the next best time is right now."

Comments